Hello! Tonight we whipped up a wonderful Garden Fresh meal for dinner. I turned on the camera so I could bring you along.
If you are interested in recipes straight from the garden, you’ve come to the right place. I plan to create videos all summer, as I am harvesting my fresh fruits & veggies.
I will be documenting everything here and showing you how I use my personal backyard grocery store to feed my family. We’ll show you some tried and true recipes but we’ll probably experiment with some new recipes too.
Please comment below if you’d like to be notified of new recipe posts. I will create an email subscription soon, but haven’t gotten around to it just yet. Your comments will help me know when it’s time.
Ok, let’s get on to the recipe.

Here is a list of everything in this recipe that was garden grown. (The spaghetti squash & mushrooms were purchased items because I did not have those on hand at the moment)

GARDEN FRESH PRODUCE
- Spaghetti Squash
- Onion
- Bell Pepper
- Mushrooms
- Basil
- Garlic
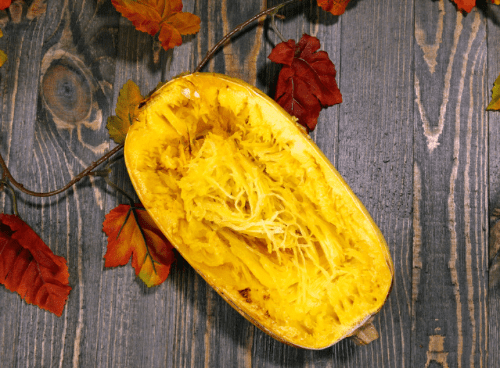
For the spaghetti squash, start by preheating the oven to 350. Cut your squash in half and scoop out the seeds. Be sure to save those seeds for future planting! I’ll do another article and video very soon to show how you save squash seeds.

Speaking of seed saving…we did save these seeds before we chopped up the bell pepper.
Check out the video below for a quick tutorial.

Once the squash is cleaned out, you can rinse both halves. Then rub a bit of olive oil on the inside. I just drizzle some oil and use my clean hands to rub it around the rim and inside the center. (Basically anywhere there is “flesh” or the part you will eat) In other words, don’t oil the outside, or shell/rind. After this I sprinkle with a bit of salt & pepper and place both halves face down on a baking sheet. You’ll put this in the oven for about 30 min or until you can easily scrape the inside out with a fork. (As shown in video) If it’s still a little too crunchy, you can bake it longer.
While your squash is baking, you’ll want to start your sauce. I am a ground beef girl! I love my BEEF! Because of my fibromyalgia, I do try to eat a clean and healthy diet, full of foods that WON’T trigger inflammation. Which means I avoid breads, starches & sugars as much as possible. (Although they are in all my favorite things . ☹️)
But I digress. You’ll want to heat a bit of olive oil on the stove and toss in your onions first, cooking until semi-translucent. This is also a good time to sauté your mushrooms and diced bell pepper too. Once the onions have softened, you can put in a clove of chopped garlic. I mix this in for just about 10 seconds and then start adding my ground beef. I use 92% lean or more. Always grass-fed. It truly does make a difference in my fibro pain.
You will continue chopping up the ground beef as it cooks, just as you would with any ground beef. (As shown on video). While it’s cooking, I like to add my fresh or dehydrated basil right now along with Salt & Pepper and any other seasoning you’d like (such as Italian seasoning).
Once the beef has browned completely, you can drain off any grease. Although, if you are cooking the lean stuff, there probably won’t be much.
At this point you can add in your spaghetti sauce. When I don’t have fresh homemade sauce from the garden, I like to use Rao’s, because it is lower in added sugar than most other brands. Although, the stores are getting better about carrying no sugar added sauces!
By this point our squash was done cooking. You can see in the video how I scraped the “noodles” out and mixed in to my sauce. You can always serve them on their own and let everyone put the sauce on themselves. But I discovered when my boys were young, I was able to make the switch from regular noodles to squash without them ever knowing the difference, because I had it all mixed together before it ever made it to their plate.
I hope you enjoy this recipe. Do you have a different way to eat spaghetti squash? If you do, please tell me in the comments. We love trying new things!
View our Stuffed Mushroom Recipe.
Remember to send those vegetable scraps to the compost and help them to GO THE Second MILE as they turn in to rich, nutrients for your soil!


0 Comments