
Don't Make These Mistakes
Today I want to show you how I created my Rain Barrel Setup on an EXTREME budget. We had a few mishaps along the way, which probably caused us to spend more money than necessary. That’s why I want to walk you through EXACTLY the steps we took and why. So you can see where the mistakes were made and how you can learn from us and save yourself money in the process.

The First Mistake
I got my first Rain Barrels in 2019 & 2020 as Christmas Gifts. These were the canvas, collapsible barrels that you can find on Amazon. I had specifically requested these because they were the most affordable options I could find on the market at the time.I had 2 of these barrels. I believe one was 100 gallons and another was 60 gallons. They only lasted a few months before they collapsed under the weight of the water. The issue was the legs. They bent and bowed out after just one rain storm. So from there it continued to get worse each time it rained. Watch the clip below to see what I mean.
Reusing What We Could
If you know anything about us and our Second Mile Mission, you know that we ALWAYS try to reuse and repurpose items. ESPECIALLY if it means we can save some money.If you notice on the image above, the rain barrels actually came with a couple of spigots each. So I had some beginning pieces I could start with, when assembling my new system.
First Things First
If you are setting up a rain barrel system for the very first time, there are a couple of things you will need to do to get your site ready.
- Choose an area with flat ground that isn’t on a slope, or be prepared to do a lot of leveling before you can set up your barrels.
- If you will be setting up your system to collect water from your existing gutter system, evaluate all of your downspouts to choose a location that has the best amount of space in case you want to expand your system in the future.
- You probably want your rain barrels in close proximity to your garden but you also want to make sure you aren’t setting them up in a prime spot for your actual garden. Some people are very limited on the amount of space they have that receives 6+ hours of direct sun (the minimum that most plants need to thrive). So if you are limited on space, don’t put your rain barrels in an area that you might want to install a garden.
- Whether you plan to install a pump and drip irrigation or just use your rain water for hand watering, you will need to make sure your barrels are somehow elevated off the ground. I personally use mine for hand watering and I’ll explain why a little later. I use 5 gallon buckets so I have to make sure there is enough space from the ground to the bottom of the spigot, so that I can fit my bucket underneath to retrieve the water.

CREATING OUR NEW SYSTEM
In 2022 I started researching how to create a BETTER rain barrel system. I knew I wanted to capture as much water as I possibly could. But I also knew I didn’t have much money to spend on this. I watched so many youtube videos trying to figure out the easiest and cheapest way. Every video I found was either WAY more money than I wanted to spend or the way they had designed things was extremely complicated and the items used were hard to find. I was on a mission to create a system that would be EASY and CHEAP to replicate. Let me show you how!
Start On Level Ground
As you can see in the picture above, I built our base out of cinder blocks and a combination of 12×12 as well as 24×24 concrete pavers. This would have worked best if I had enough of the larger pavers to use for the whole project. But I was working with what I had on hand.It took HOURS of using my auger to dig out the area and flatten it and dig some more and flatten some more. This picture is from a year later so there has been some settling.If you can afford to use more cinder blocks, it would be best to just place all of your blocks together and then cover with the pavers. Since I was working with what I had, I tried to maximize the space by leaving just a bit of a gap, in order to make my platform wider without needing to purchase more blocks. This took HOURS to perfect though, so if you have the money to buy a few more blocks, I would highly recommend it!

What Makes a Good Barrel Option?
I searched all over for the very best price for our “barrels”. What we landed on were these 32 Gallon trash cans for $14 at Atwoods. I would have liked to have gone with larger cans but the prices were just too high. One of these days we will expand our system but we just can’t afford that yet.Spending around $45 to have 3 rain barrels last year was definitely a wise investment for us. What wasn’t wise is that we kept forgetting to bring them inside at the end of the season. AND they busted. All 3 of them. We had to purchase new trash cans this year. And the price had increased a little too. So that definitely hurt! We learned our lesson though and I don’t think we’ll ever put off winterizing these things ever again!
Creating a Linking System
Figuring out how to link our rain barrels together actually caused a little disagreement between me and Art. I firmly believed the links needed to be placed at the bottom and he believed they needed to be at the top. I couldn’t wrap my head around how a top placement would work properly. I’m still not sure about that.With a bottom placement, you can ensure that all of the barrels are filling up or draining at an equal pace. My concern with top placement is that once the first barrel drops below that drain line, it’s not going to fill the next barrel. We actually did both. Art used some 50 gallon drums that we had gotten for free. He had created a 3 barrel system over by our south garden. Unfortunately, those didn’t work out because of the linking system. If you would like us to show an in-depth video comparing the two, please let us know in the comments below.
Using Drip Tubing
I had already decided I would be linking my barrels together using my 1/2″ drip tubing. I had a 75 foot roll in my attic and I knew it would be sturdy enough. The question was, how do I attach it to the barrels without having any leaks?
Hole Saw Disaster
I can’t remember now which came first. But I think I had decided I needed a 1/2″ hole saw because my tubing was 1/2″ tubing. I was wrong. I think I wound up having to get a 3/4″ hole saw because the other was too small. Or maybe I got the 3/4″ and it was too big? I can’t remember now. I do know that we now own BOTH the 1/2″ AND the 3/4″. The moral of the story is to make sure you have the size YOU need before you start purchasing your parts. I ordered a kit off amazon but be careful because some of the kits don’t go down to 1/2″. So be sure to read the fine print!

Finding the Best Attachments
We wound up having to purchase 2 different types of attachments because we had already cut certain holes and I was determined not to have to let those trash cans go to waste. My hope is, by showing you the 2 different options, you can make your choice based on what hole saw size you have available to you.If you are using 1/2″ drip tubing like we did, the cheapeast and easiest option for you are these blue attachments that we purchased in the plumbing department at lowes.

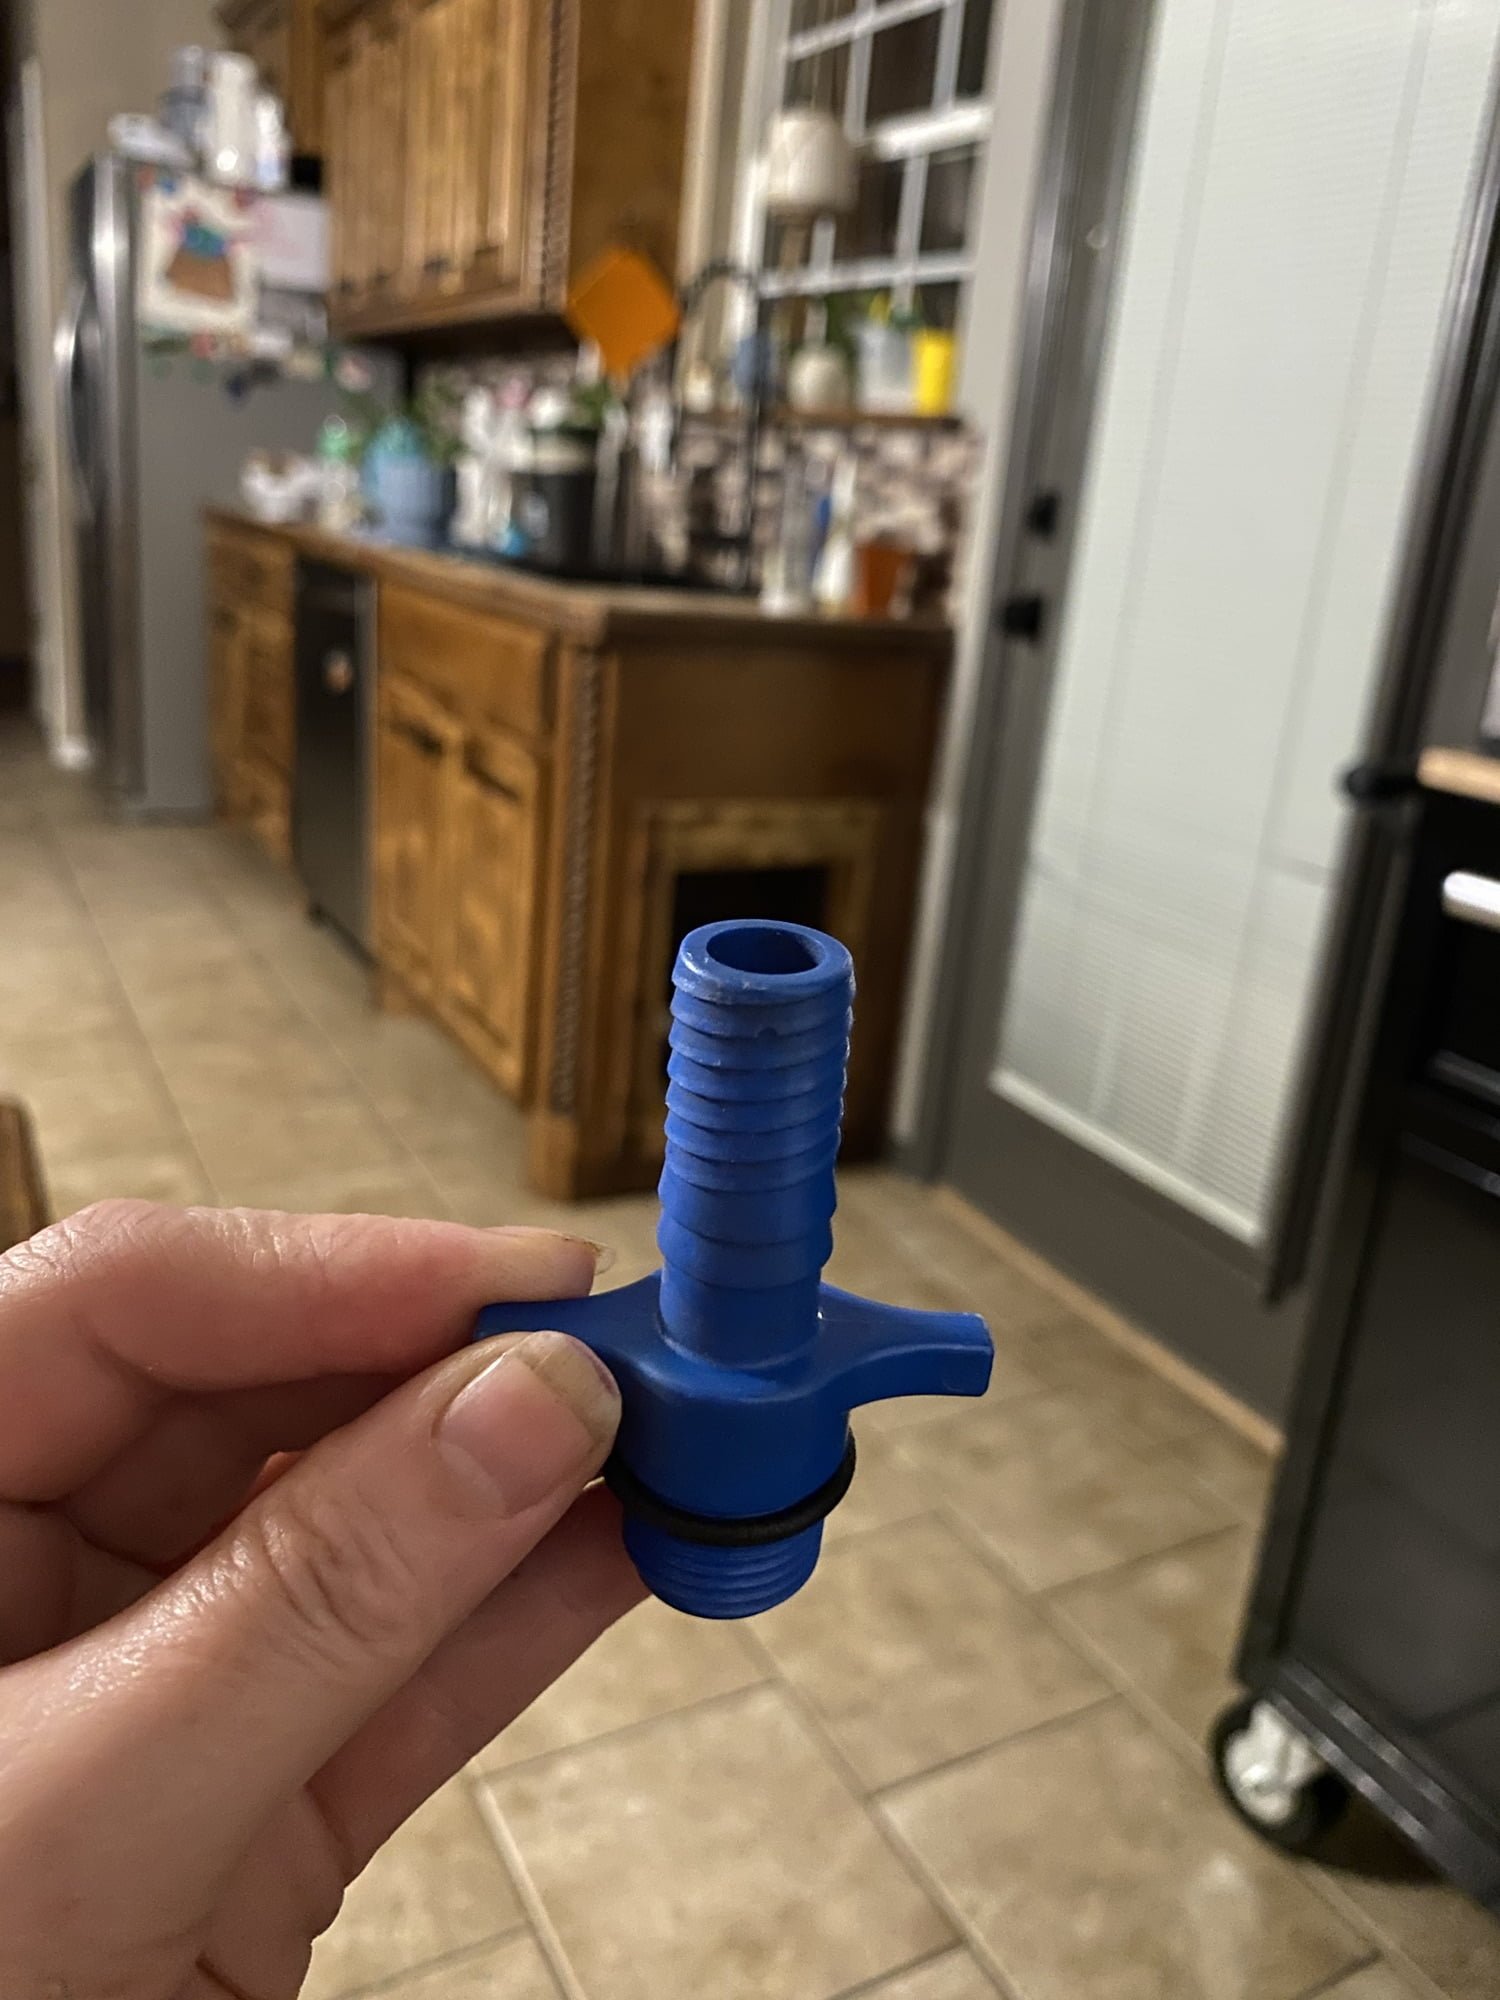


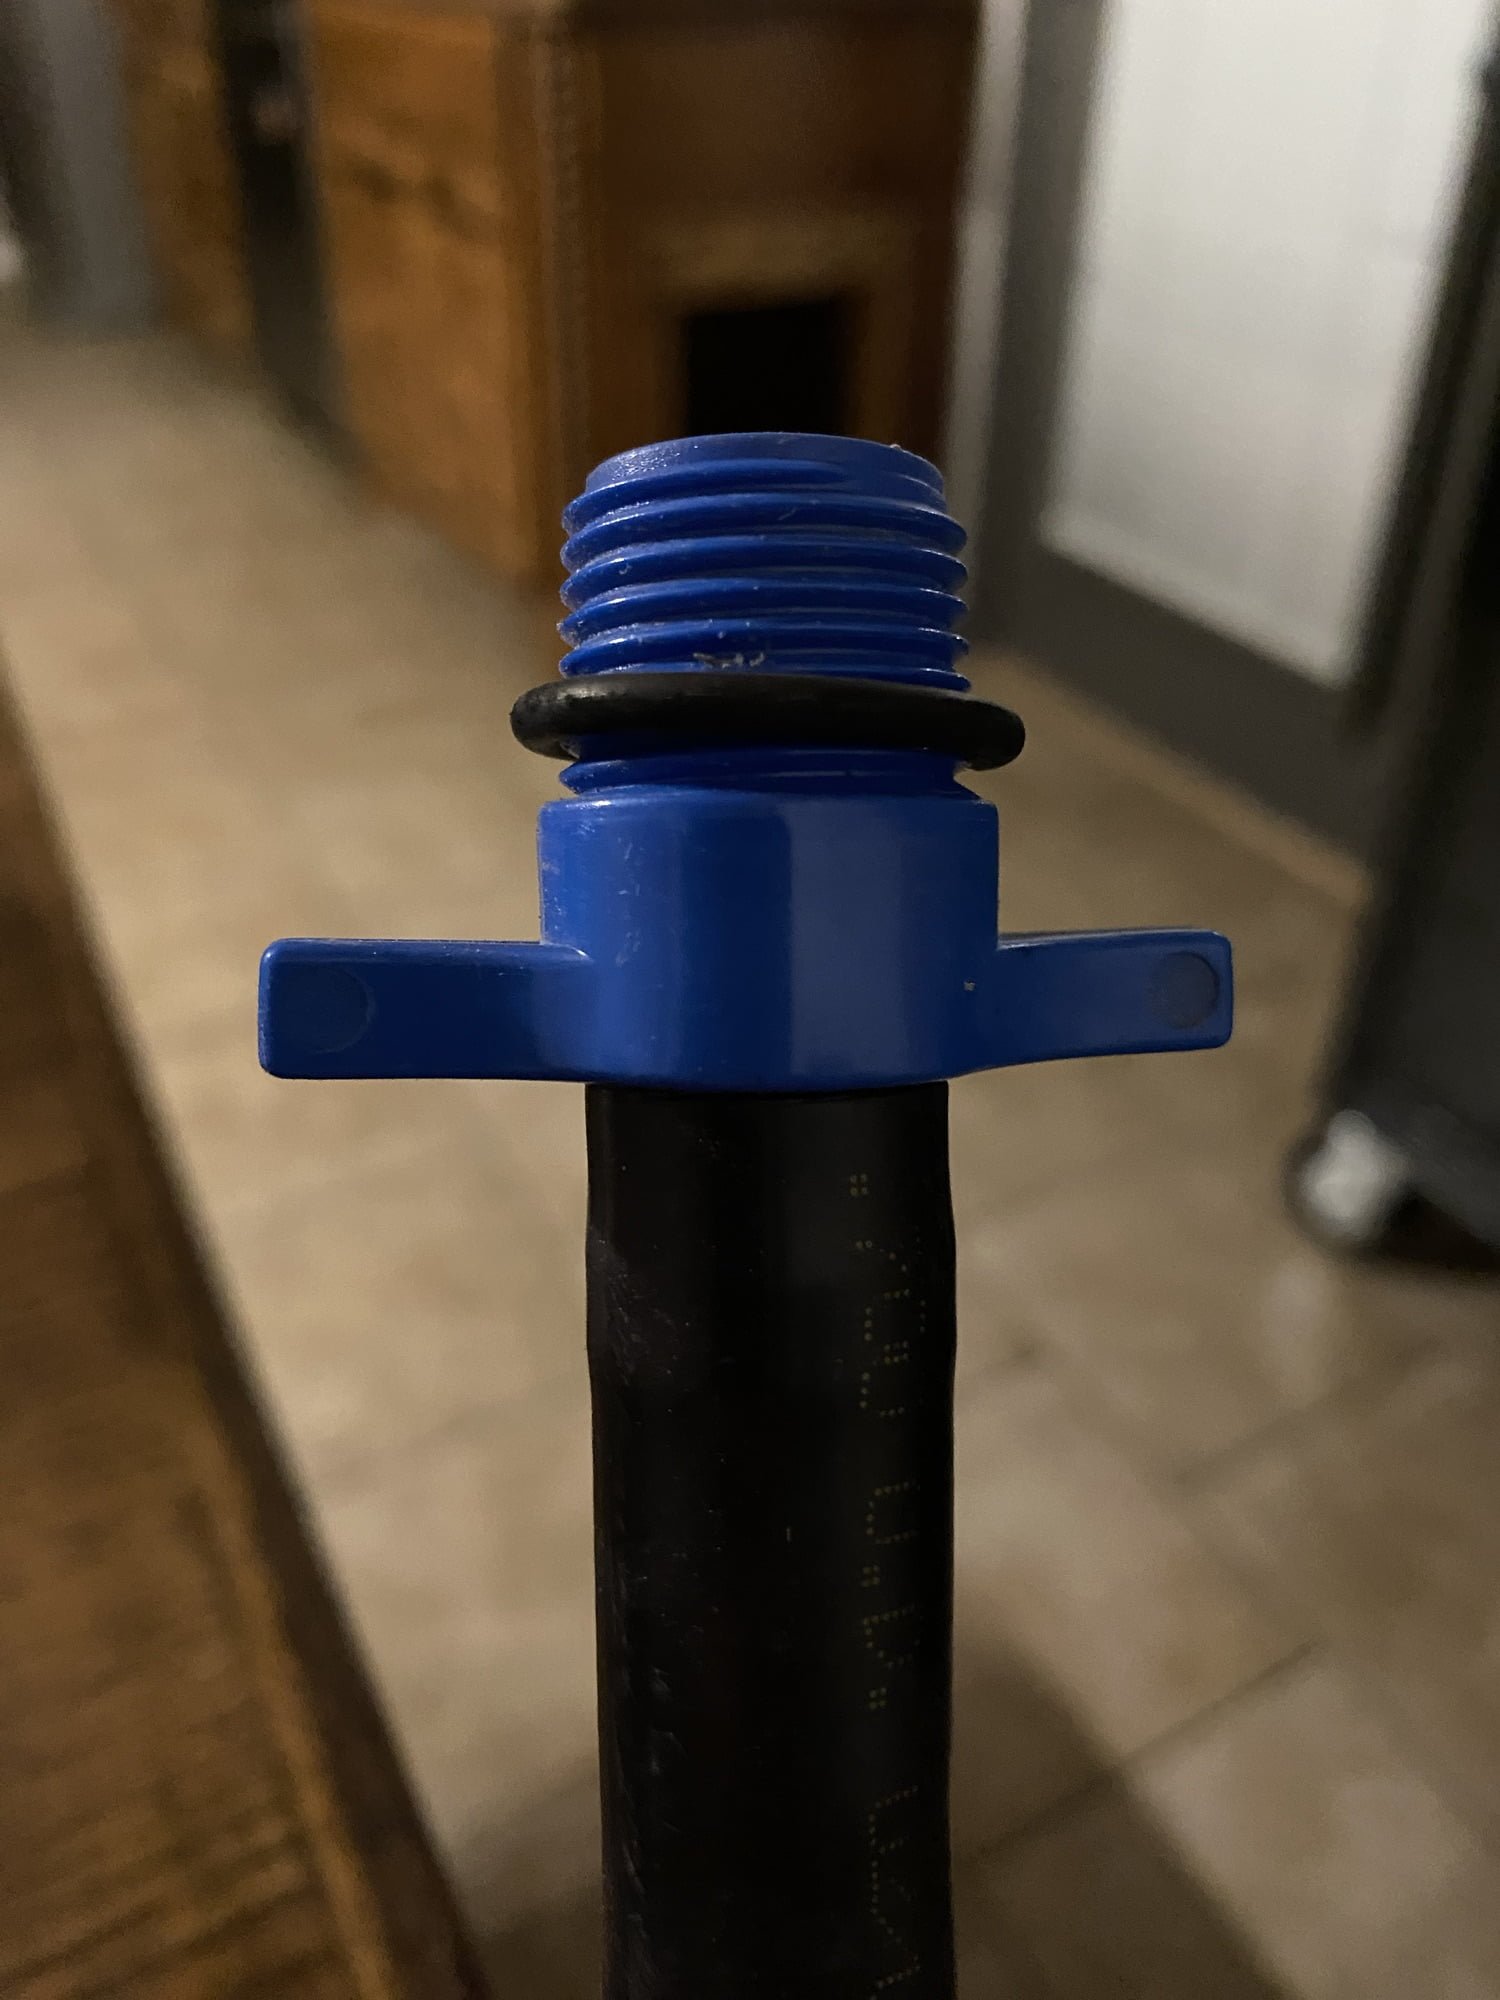


As you can see, if you look this up in the Lowe’s app, it will tell you exactly what aisle to find these. The male adapter comes as a 5 pack for $1.97. You seriously can’t beat that price! If this is the route you choose to go, you will need to get a bag of these 1/2″ rubber washers. (also only a couple dollars) And make sure you have some teflon tape (plumbers tape) so you can get a water tight seal. If you look at these images, you’ll notice that whether you get the male or the female adapter, it is ribbed on one side. This is the side you can push into your drip tubing. I go into more detail in our YouTube Video below so be sure to check that out. In this example, I had attached the drip tube onto the male adapter. Then I placed a rubber washer at the base of the threaded part. You can’t see it in these images but you will see it on the YouTube video…I also ran some teflon tape around the threads. Make sure your tape goes the opposite direction of the threads. I also talk more about that on the video. Next you are ready to insert this end into one of the rain barrels. You will need the female adapter to go on the inside of the barrel. You will simply screw it onto the threaded side of the male adapter. You can now do the same thing to the other end of your drip tube and repeat this process depending on how many barrels you have.
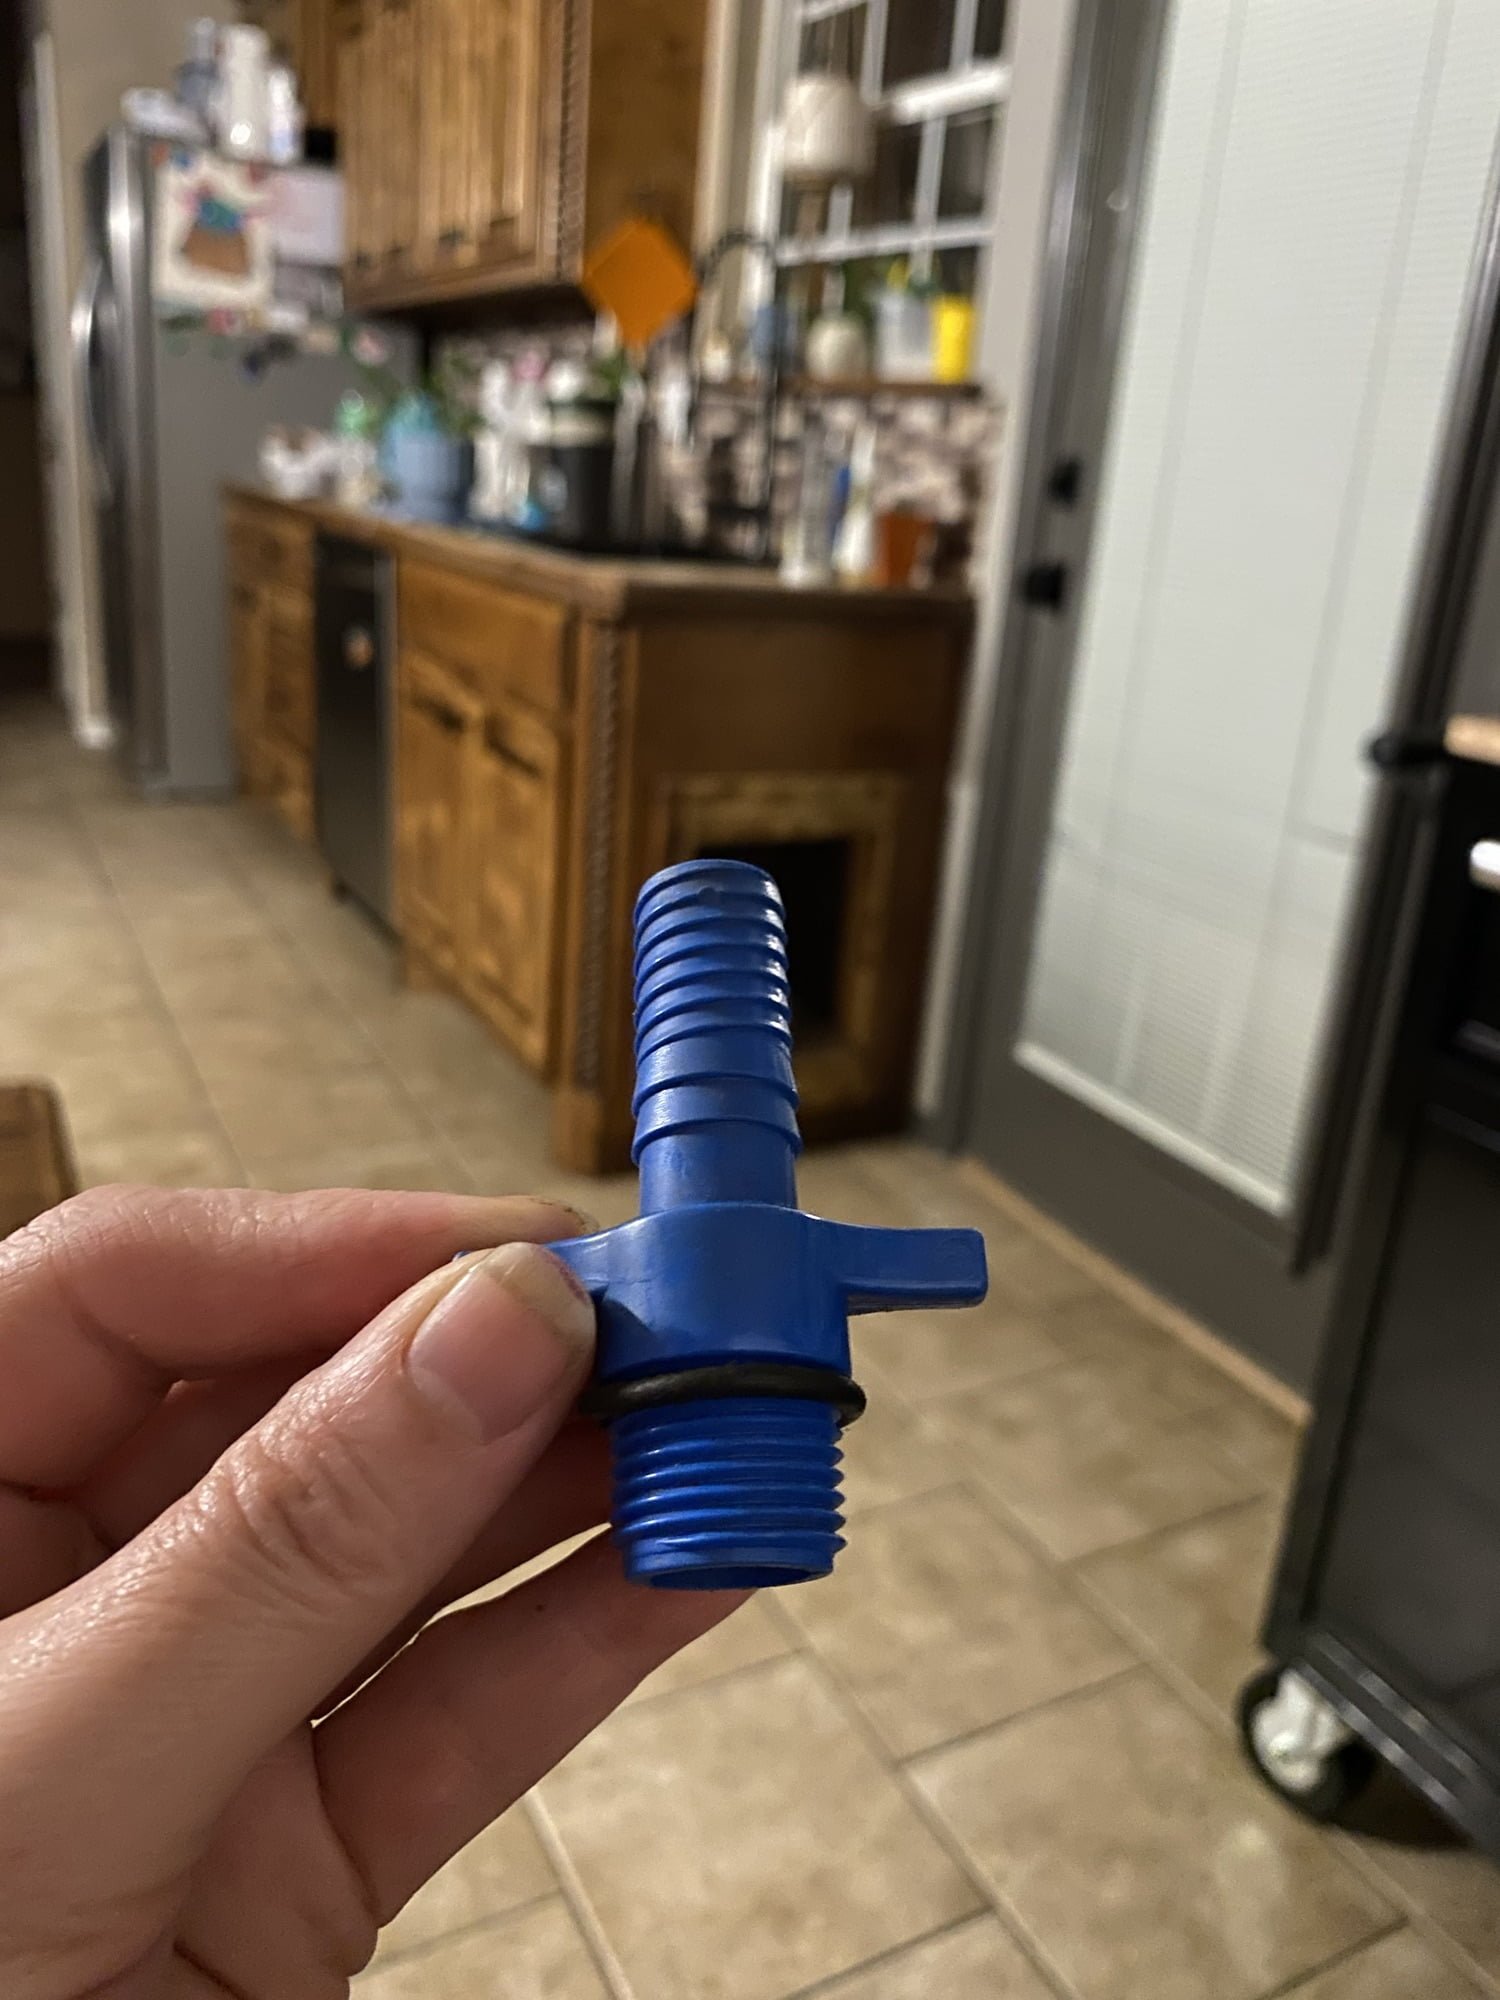
What If You Are Using a 3/4" Hole Saw?
Now, if you have a 3/4″ hole saw, I have another option for you. I ordered the 4 pack shown below from Amazon for under $15 (at the time).
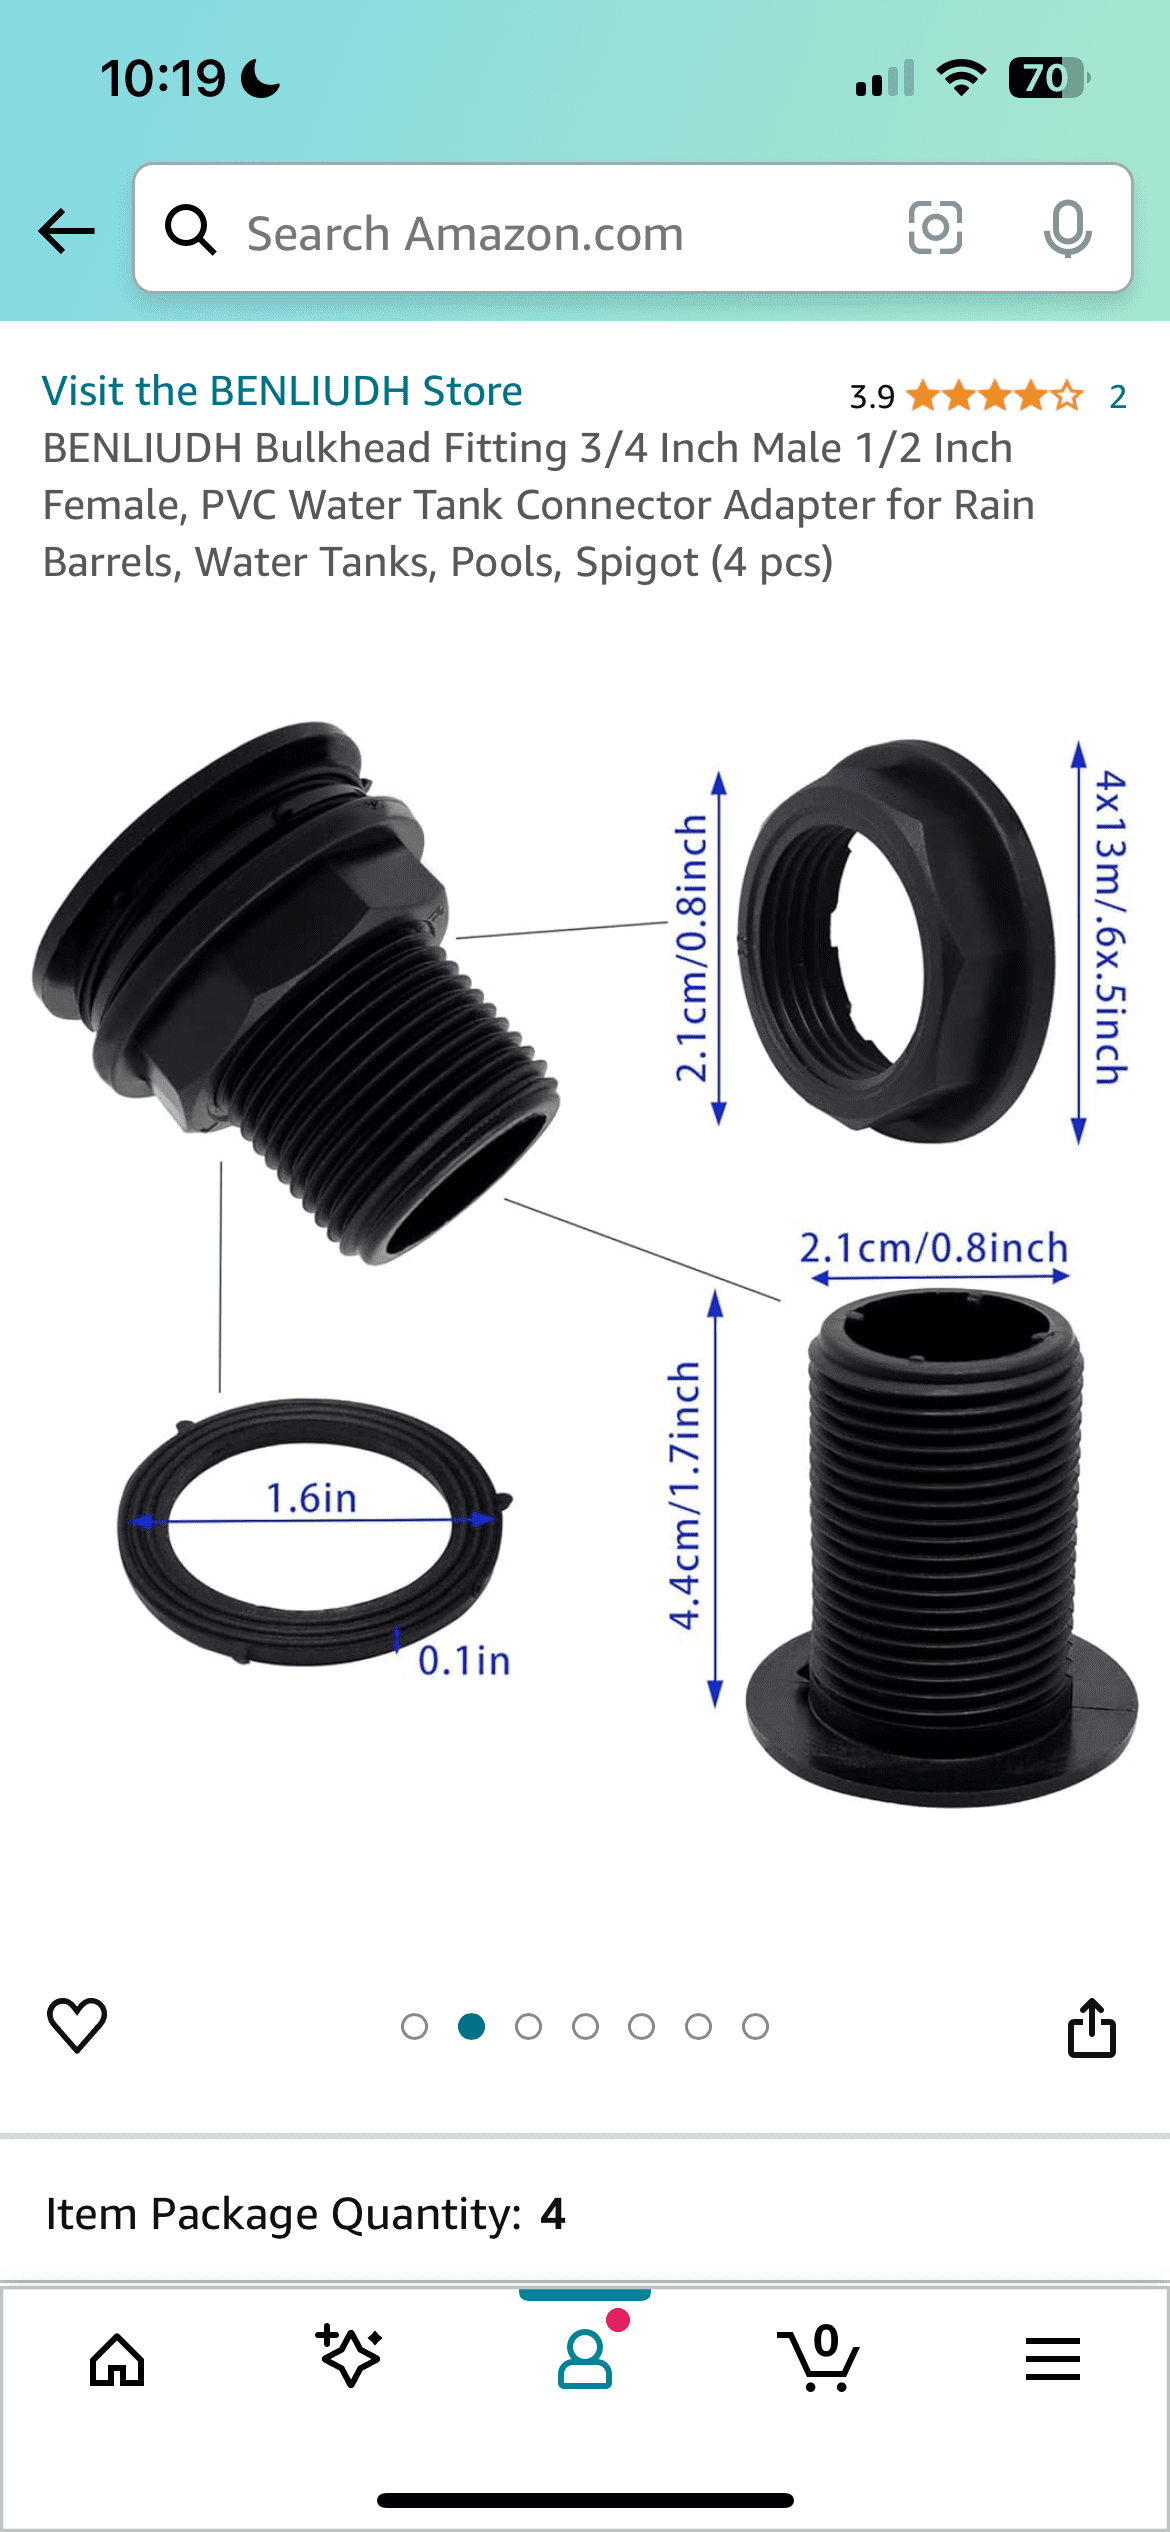
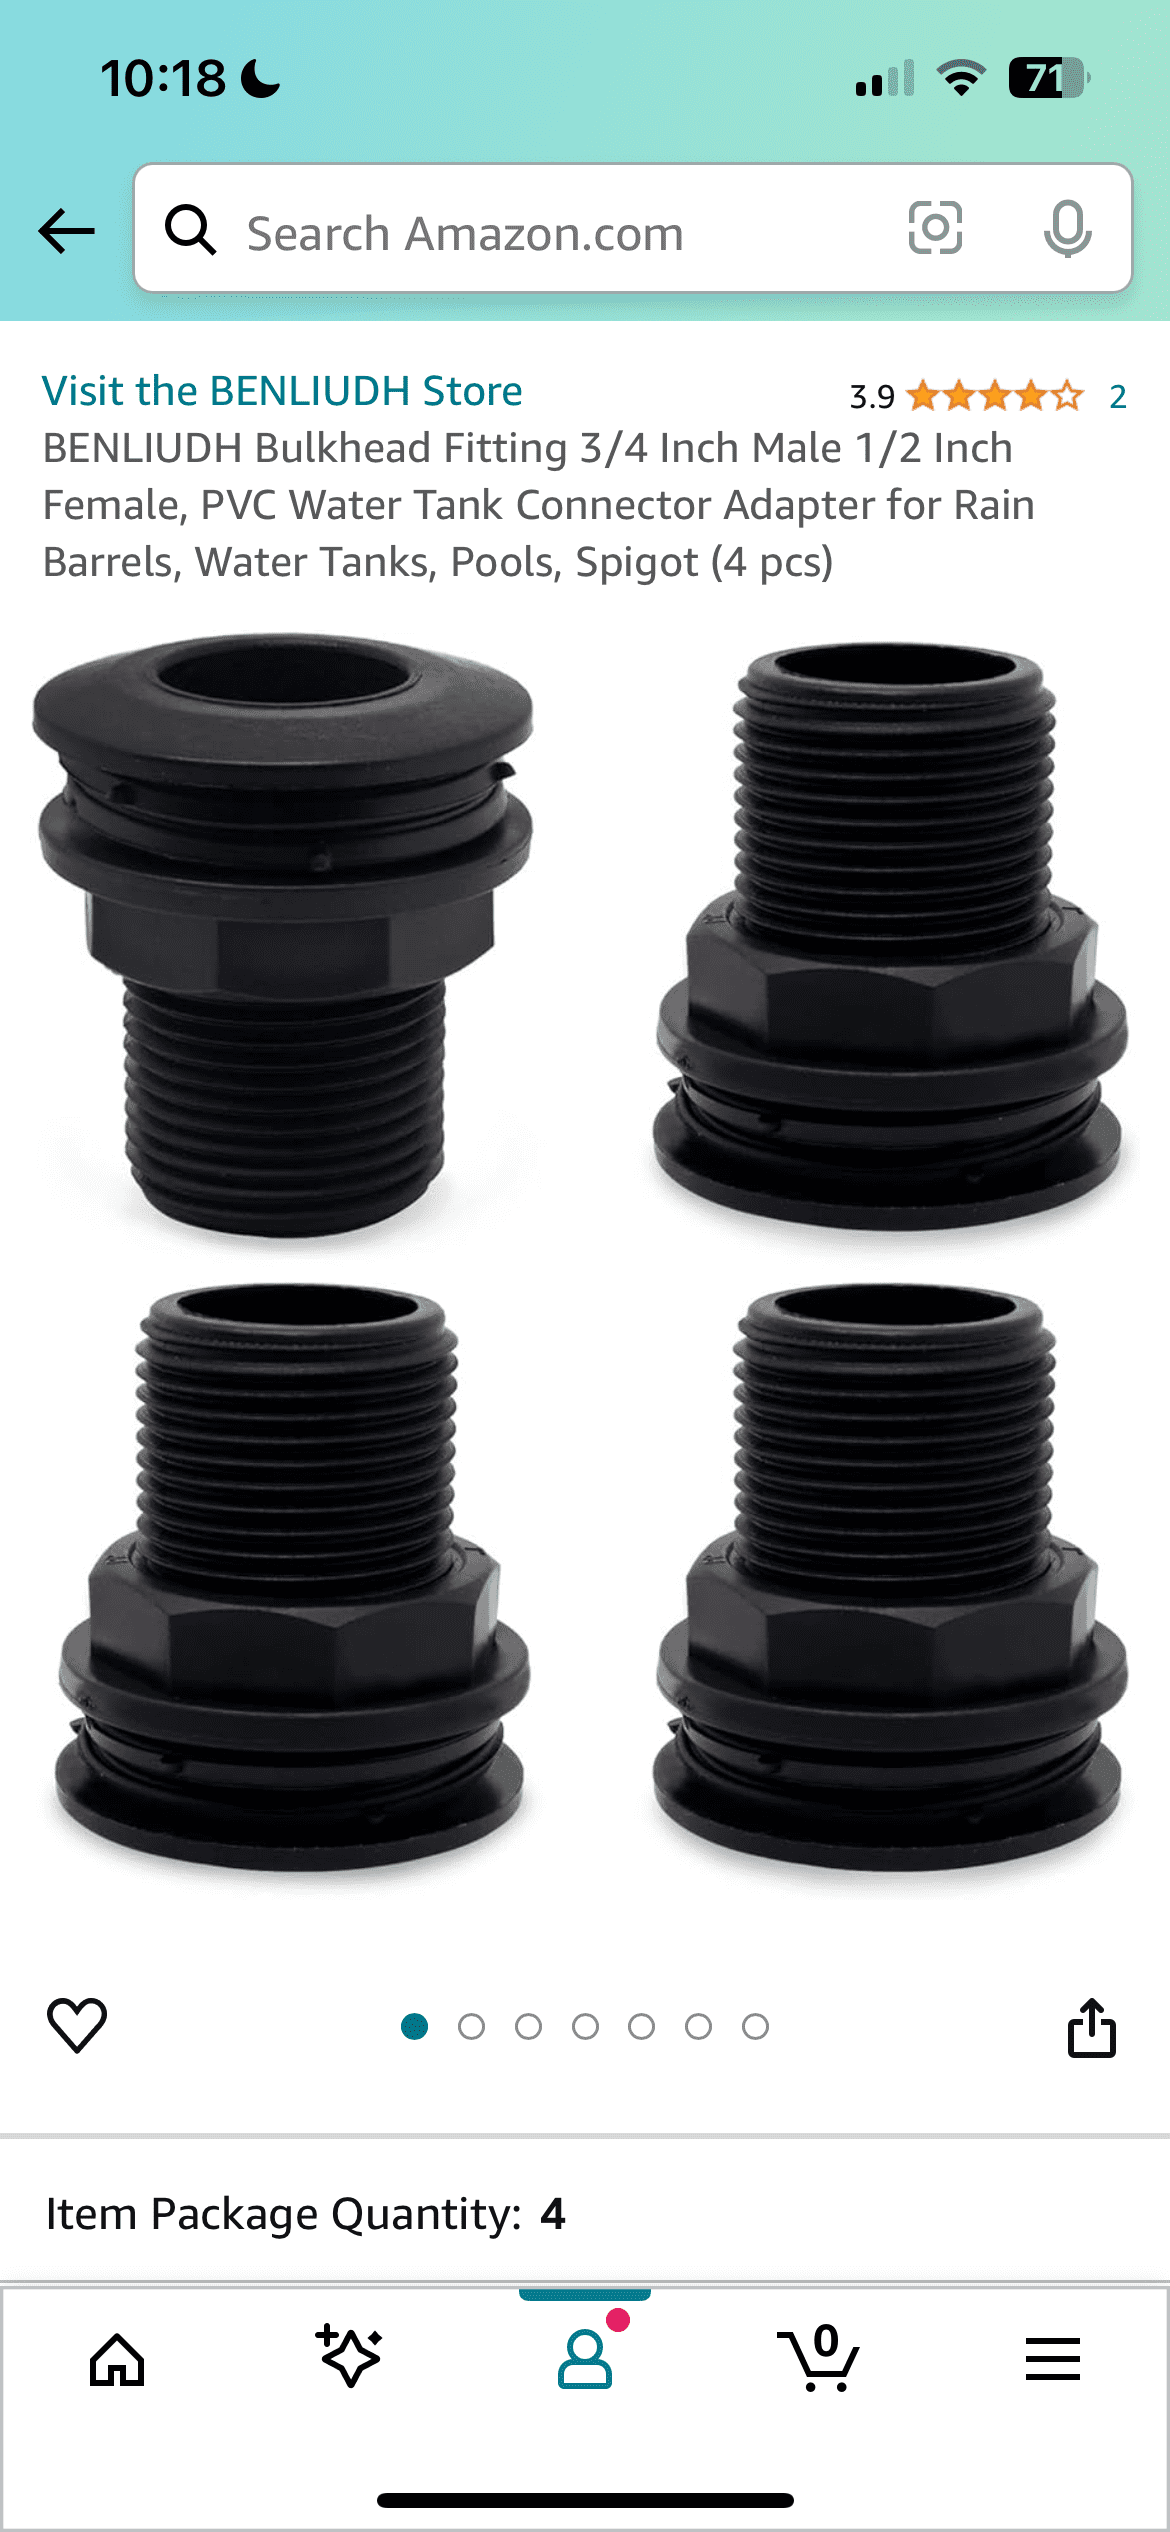

If I remember correctly, I believe we had to purchase these because we had already cut a hole in one of our barrels that was 3/4″. So for these attachments, the threaded area on the outside is 3/4″, while the threads on the inside are 1/2″. Each of the 4 pieces comes with a rubber washer and a plastic nut to hold it in place. So to fill my 3/4″ holes, I simply inserted the threaded end of the spigot into the barrel from the outside. Then I screwed the nut on from the inside to secure it firmly in place. I still used the male adapters that we purchased from lowe’s in the previous section. Those were needed so that we could attach the drip line securely. Then instead of screwing the threaded end of the male adapter into the female end, you will just screw it in to this instead. So that is how you can set up your rain barrels for SUPER CHEAP no matter whether you have a 3/4″ hole saw or a 1/2″ hole saw. Or BOTH, like we did.


0 Comments