
Growing your very own peanuts at home can be a fun and exciting project to try. And don’t worry if you don’t have a lot of space because peanuts grow great in grow bags just like these.
A COMPLETE GUIDE FROM SEED FOR A NUTRIENT-PACKED HOMEGROWN HARVEST!

These are the bags that I currently use. I like the 10 gallon size and the fact that it has the velcro side so you can check on crops like potatoes, carrots and of course peanuts.
*This is an Amazon Affiliate Link which means if you make a purchase after clicking our link, we may receive a small comission. This is at no extra charge to you, of course.
At the time of publishing, the bags shown above are currently 25% off! That brings the price down to only $3/bag. (be sure to confirm before purchasing, as pricing changes often)
Once you have your grow bags, you’ll want to make sure you use a high quality soil mix. For the very best bang for your buck, we highly recommend our DIY Soil Mix. You can watch our video below. (Sorry for the quality of this video. This was one of the very first videos on our channel. We like to think we have improved a LOT since that time!)

Now that we have our grow bags filled with high quality soil, we are ready to begin!
As with all plants, you will need to know your last frost date. You can always do a quick google search if you don’t know yours. I also recommend the Old Farmer’s Almanac as a good resource. Using this link will take you straight to a page that allows you to enter your zip code to determine your last frost date.
I garden in Oklahoma Zone 7A. Once you know your Zone, please share it in the comments. I love knowing what zone my readers are in. It helps me plan more content for you in the future!
CHOOSING THE RIGHT TIME AND TEMPERATURE
- Timing: Peanut seeds should be started indoors 4-6 weeks before the last expected frost in your area. You can move your grow bag outdoors after all danger of frost has passed.
- Temperature: Peanuts thrive in warm temperatures. The soil temperature should be at least 60°F (15°C) for planting. Ideal growing temperatures range from 70°F to 90°F (21°C to 32°C).

In my growing zone, our last frost ranges from April 1 – April 15 each year. However, we don’t typically experience temps in the 70’s until later. For this reason, I typically wait to move my grow bag outside until May or June, just to be safe.
STARTING SEEDS
I like to pre-sprout my peanuts. This is very similar to how I pre-sprout my pea seeds.
You’ll just get a damp paper towel and place your peanut inside (remove it from the shell but leave the brown papery skin intact if possible) fold the paper towel over and place in a ziploc bag, removing all the air. Make sure the towel doesn’t dry out.

In about a week, you’ll see sprouts coming out of it and that’s when you can go ahead and plant in your soil.

PLANTING YOUR PEANUTS
- Sow peanuts 1-2 inches deep in the grow bag, placing the seeds about 8 inches apart.
- Water the soil well after planting to ensure good seed-to-soil contact.
WATER AND SUNLIGHT
- Keep the soil consistently moist but not waterlogged, especially during the flowering and pod development stages.
- Peanuts require full sunlight. Aim for at least 6-8 hours of direct sunlight per day.
FERTILIZING
- You can choose to use organic fertilizers rich in phosphorus and potassium, as peanuts require these nutrients for flowering and pod development. I know some gardeners don’t even bother adding fertilizer to their legumes since they produce their own nitrogen. I always err on the side of caution and make sure to amend my soil at least at planting time and by utilizing compost in my DIY Soil Mix.
- You can also side dress with compost during the growing season to provide a steady supply of nutrients.
MAINTENANCE
- Regularly check for pests and diseases. Use organic pest control methods to minimize damage. There is great information on the OSU Extension Office Website (this is where I went through the Master Gardener’s Program). Even if you don’t garden in Oklahoma, I do encourage you to check out the information as some of it may pertain to various areas. You can also do a quick google search to find the Local Extension Office for your home state. If you aren’t sure, please comment below with where you are located and I would be happy to get some information for you.
- Download a PDF of the OSU Fact Sheet CR-7174.
- Provide support for the peanut plants if they become top-heavy as the pods develop. This is especially important in grow bags. Peanuts probably do best when grown in the ground, so they have plenty of space for their “pegs” to penetrate the soil.
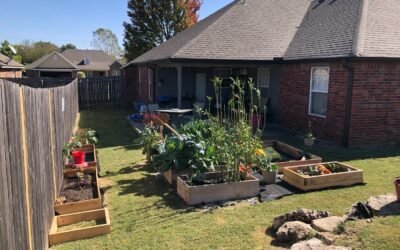
One thing I’ve had issue with in most recent years is the enormous amount of rain we have had here in my area. That’s why I like grow bags. For one, the bag provides oxygen to the soil but also it dries out faster and keeps plants from getting water-logged. Even if that were not the case, the portability of the grow bag allows me to move it around to a drier location, if needed. This is the main reason I haven’t grown peanuts in the ground recently.

FUN FACTS

The peanut plant is unique in that it flowers above the ground, but fruits below ground.
Yellow flowers appear about 40 days after planting. After the flowers pollinate themselves, the petals fall off and the peanut ovary starts to form.
The ovary is called a “peg.” The peg grows down from the plant forming a small stem which extends into the soil. The peanut embryo is in the tip of the peg. When the peg penetrates the soil, the embryo turns horizontal to the soil surface and begins to mature taking the form of a peanut. The plant continues to grow and flower and can produce up to 50 pods.
TIME TO MATURITY
Peanuts typically take about 120 to 150 days to reach maturity. Monitor the plants for the development of flowers and pods. Make sure your soil is free from rocks or debris that would hinder the peg from penetrating the soil surface.

HARVESTING
- Harvest peanuts when the leaves start turning yellow and the plant begins to dry. This is usually 120-150 days after planting.
- Gently lift the entire plant, shake off excess soil, and allow the peanuts to air dry for a day or two.
CURING
- After harvesting, peanuts need to be cured to allow them to dry properly. Lay them out in a warm, dry place for about 2-3 weeks.
- Once cured, remove the peanuts from the vines and store them in a cool, dry place.
STORING
Store cured peanuts in a cool, dry place in a breathable container. Properly stored, peanuts can last for several months.
CONCLUSION
As with any crop, you’ll want to avoid planting peanuts in the same spot every year to prevent soil-borne diseases. Practice crop rotation to maintain soil health.
By following these guidelines, you can successfully grow organic peanuts in a grow bag, providing you with a rewarding harvest of homegrown, nutritious nuts.
We recently had a surprise peanut harvest while emptying old grow bags and containers to prepare for winter. I had completely forgotten about my 2 grow bags of peanuts sitting out in the main garden.


We’ll do a more detailed video when we start our next crop of peanuts. I hope you will subscribe to our channel so you don’t miss that update. In the meantime, check out this brief video where we empty our peanut bags to start some fall compost.
0 Comments