
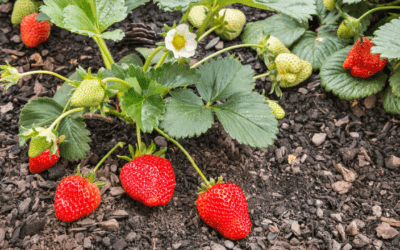
I recently took a class about Greenhouse Gardening in the hopes I might learn something new before Art and I build our first greenhouse. There were some people in the class that are pretty new to gardening. The questions they had really inspired me to write my next few articles. I realized there are still plenty of people needing to know the basics of starting a garden. They had questions about Soil Mix, Grow Lights, Composting and Seed Starting. I plan to address each of those questions over the next few articles but today we’re going to focus on Seed Starting.
(Side note: As we address each topic, I will come back and add links to the other articles. If you are more of a video watcher, check the article because there is usually a link to the corresponding video)
Starting seeds indoors is a rewarding and cost-effective way to jumpstart your vegetable garden. By sowing seeds before the outdoor growing season, you can extend your harvest, have better control over your plants, and ensure a healthy start for your crops. This comprehensive guide will walk you through the entire process, from choosing the right time to start seeds to transplanting seedlings into your garden.

Choosing The Right Time To Start Seeds
The timing of starting seeds indoors is crucial for a successful vegetable garden. The ideal time varies depending on your location, the type of vegetables you want to grow, and your climate zone. Generally, you’ll want to begin the process 6-8 weeks before your region’s last expected frost date, but you should always check your seed packet to see when they recommend you start. You can find your frost date by simply performing an internet search (such as google) for “Average Last Frost Date For __________” (fill in your city and state or your zip code to complete a search)You can also consult your local agricultural extension office.
Selecting The Right Seeds
When choosing seeds, consider the following:
- Your hardiness zone
- The amount of space you have
- Personal preferences for crop varieties
- Your experience level as a gardener
Gathering Your Supplies
Before you start sowing seeds, there are some supplies you’ll need to gather. I’ve broken them down in to MUST HAVE and OPTIONAL. For further details, I highly recommend you watch my seed starting video to learn more about whether the supplies listed are optional or must-have for YOU.
MUST HAVE SEED STARTING SUPPLIES
- Containers: Seed trays, cell packs, or small pots.
- Seed Starting Mix: Use a high-quality, sterile mix designed for seedlings.
- Seeds: Make sure they are fresh and from a reputable source.
- Labels: To identify your plants. (Can also use popsicle sticks or whatever you have on hand)
- Light Source: Grow lights or a sunny windowsill.
- Marker: For writing on labels. (I find a fine tip sharpie works best)
- Spray Bottle: For gentle watering.
OPTIONAL SEED STARTING SUPPLIES
- Heat Mat: For warmth and even germination.
- Plastic Dome or Plastic Wrap: To create a mini greenhouse.
- Fan: For air circulation (to prevent damping-off disease).
- Watering Can: I prefer to bottom water my seedlings. We’ll discuss this in-depth.
- Timer: To monitor your light schedule.
- Garden Journal: To track your seeds progress and make notes about your experience.
- Hygrometer: This is completely optional but can prove helpful if you find you are having issues.
Please note: Any of the items linked above will take you to the items we personally use from Amazon. These are affiliate links which means if you make a purchase after clicking one of our links, we may earn a small commission, at no additional cost to you. Please know we will not promote a product we don’t personally use and believe in. We appreciate you making purchases from any of our affiliate links, as it helps us to continue making content to share with you.
If you would like a more in-depth article about any of this information, please let me know in the comments. I would be happy to any questions you may have.
Preparing Your Seed Starting Mix
Use a high-quality seed starting mix, which is lightweight, sterile, and fine-textured. It provides excellent aeration and moisture retention for young seedlings. Fill your containers with the mix, leaving a little space at the top for watering.

I like to use Burpee Seed Starting Mix. It’s one of the best priced items on Amazon when it comes to organic coconut coir. At the time of this article, you get 2 blocks for $11.95. This is a great price and I typically only use one block each season. So it goes quite a long way.
Sowing Seeds
Follow these steps for successful seed sowing:
- Moisten the seed-starting mix before planting.
- Sow seeds at the recommended depth on the seed packet.
- Space seeds evenly to avoid overcrowding.
- Label each container with the plant variety and sowing date.


Creating The Right Environment
Seedlings require specific environmental conditions to thrive:
- Light: Provide 12-16 hours of bright light per day. If you don’t have a sunny windowsill, use grow lights.
- Temperature: Maintain a consistent temperature between 65-75°F (18-24°C).
- Humidity: Cover your containers with a plastic dome or plastic wrap to create a mini greenhouse effect.
- Ventilation: Use a fan on low speed to promote air circulation.


Watering and Fertilizing
Keep the seed-starting mix consistently moist but not waterlogged. Use a spray bottle for gentle watering to prevent disturbing the seeds. Fertilization isn’t typically necessary until the seedlings have a few sets of true leaves, usually 2-3 weeks after germination. Use a diluted, balanced liquid fertilizer.
Hardening Off Seedlings
Before moving seedlings outdoors, they need to acclimate to the outdoor environment. Gradually expose them to outdoor conditions over a week or two, starting with a few hours of direct sunlight and increasing the time daily.
Transplanting Seedlings
When your seedlings have at least two sets of true leaves, it’s time to transplant them. Follow these steps:
- Water the seedlings to help loosen the soil.
- Gently remove seedlings from the containers, handling them by the leaves.
- Prepare your garden bed or larger pots.
- Dig a hole for each seedling, spacing them according to the plant’s recommendations.
- Place the seedlings in the holes and water gently.
Conclusion
Starting seeds indoors can give your vegetable garden a head start, ensuring a bountiful harvest. By carefully selecting the right seeds, providing the ideal environment, and transplanting your seedlings correctly, you can enjoy healthy, homegrown vegetables all season long. Happy gardening!
BONUS INFORMATION
If you are interested in receiving free seeds to begin your seed starting journey, I would love for you to join us on Facebook in the Second Mile Seed Journey group. You will need to send us an email with your Name and Mailing Address. Send that email to SecondMileJourney@gmail.com Be sure to put SEED JOURNEY in the subject line. We look forward to hearing from you and helping you grow your seed collection!
0 Comments