
Hey Everyone! Today I am so excited to be sharing with you exactly how I grow Ground Cherries in my small suburban backyard garden. I first discovered ground cherries in 2020 and they have since become my very favorite thing to grow.
What Is A Ground Cherry?
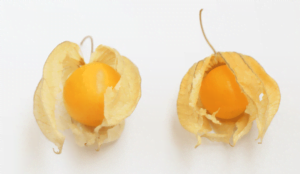
Ground Cherries are also known as Physalis or “husk” cherries. They are a fun and unique addition to any vegetable garden. These small, sweet, tart fruits are encased in papery husks, very similar to tomatillos. They can be enjoyed fresh or used in various culinary creations; such as jam or pies.
Growing Ground Cherries organically requires proper attention to soil preparation, planting, care and harvesting. This comprehensive guide will walk you through each step. We will help you cultivate healthy and productive ground cherry plants in YOUR organic garden.
How Would YOU Describe The Flavor of Ground Cherries?
Choosing a Suitable Location:
Like most vegetable & fruit plants, Ground Cherries thrive in full sun. This means they need at least 6-8 hours of direct sunlight each day. Find a spot in your garden that receives enough sunlight and has well-draining soil.
Soil Preparation:
Organic gardening starts with healthy soil. Ground Cherries prefer slightly acidic to neutral soil with a pH range of 6.0 to 7.0. To prepare the soil:
- Remove any weeds or debris from the planting area
- Incorporate organic matter, such as compost or well-rotted manure, to improve soil structure and fertility.
- Avoid excessive nitrogen-rich fertilizers, as they can lead to lush foliage but fewer fruits.
Keep in mind, if you already use the DIY Soil Mix that we recommend, you are in GREAT SHAPE to grow ground cherries.
Starting Seeds:
You can start ground cherry seeds indoors or directly sow them outdoors, depending on your growing season. Ground cherries are actually a form of tomato plant so they are basically grown like a tomato.
- Start seeds indoors 6-8 weeks before the last expected frost date in your area.
- Use seed trays or small pots filled with a high-quality seed starting mix. (I prefer coconut coir)
- Sow seeds about 1/4 inch deep and water gently.
- Keep the soil consistently moist and maintain a temperature around 70-75°F (21-24°C). I use a mister bottle to keep my soil moist
- Once seedlings have a few sets of leaves and the danger of frost has passed, transplant them outdoors or in to a pot or grow bag.
- If you are direct-sowing your seeds; be sure you wait until ALL danger of frost has passed. I have lost MANY ground cherry plants early in the season because I got impatient and transplanted them too early.
Hardening off:
If you started your seeds indoors, you’ll need to transplant the seedlings in to your garden once they are strong enough. You’ll need to harden off the seedlings by gradually exposing them to outdoor conditions over the course of a week before transplanting. The hardening off process is basically the same for all plants.
- Check your forecast for the week to choose the proper time to begin hardening off your plants.
- Put them outside for just a few hours each day, gradually increasing the amount of time outdoors.
- By the end of the week you should have built up to a full day and can now plant the seedlings in the ground.
- Be sure to check the forecast to ensure you don’t have any harsh weather heading your way over the next couple of days.
Transplanting seedlings:
- Choose a cloudy day or transplant in the late afternoon to minimize stress on the seedlings.
- Dig holes slightly larger than the root ball of the seedling.
- Gently remove the seedling from their pot, taking care not to damage the roots.
- Place each seedling in a hole, spaced about 18-24 inches apart.
- Back fill the hole around each seedling, and pat down gently around the base of each plant.
- Water in gently at the roots, avoid watering the plants leaves if at all possible.
Mulching:
Mulching helps maintain a consistent soil temperature, retains soil moisture and suppresses weeds. You should always apply a layer of mulch around the base of the plants. This can be straw or wood chips or whatever you like to use for mulch.
We prefer to use EZ Straw as the mulch for ALL of our plants.
This is an amazon affiliate link that we have included for your convenience. However, we recommend you check with your local Ace Hardware for EZ-Straw because they typically have the best price!

Watering:
Water consistently, aiming for about 1 inch of water per week. Keep the soil evenly moist but not waterlogged.
Here in Oklahoma where our temps are in the triple digits for most of the summer, I do have to water DAILY. If your plant starts to droop in the heat, give them a drink of water and you’ll be surprised how quickly they bounce back.
Support and Pruning:
You can use stakes or cages to keep ground cherry plants upright, if you choose. I have never used any type of support on my plants but I’m sure some people might find it helpful. You do want to prune any diseased or damaged foliage.
Fertilization:
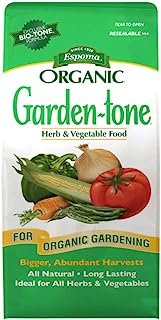
Organic fertilizers, such as compost or well-rotted manure can be applied to the soil around the base of the plants during growing season. Avoid using really high nitrogen fertilizers for any type of fruiting plant because it will lead to excessive foliage growth and fewer fruits. For organic gardening, I like to use Espoma or Neptune’s Harvest.
Espoma’s Garden-Tone is a great option for ground cherries. The
N-P-K ratio is 3-4-4, which indicates there is higher Phosphorus and Potassium than Nitrogen.
Espoma’s Tomato-Tone is also a good option since it is specifically for tomato plants. The N-P-K is 3-4-6 so it has a little more potassium plus a good amount of calcium which is always good for any type of tomato plant.

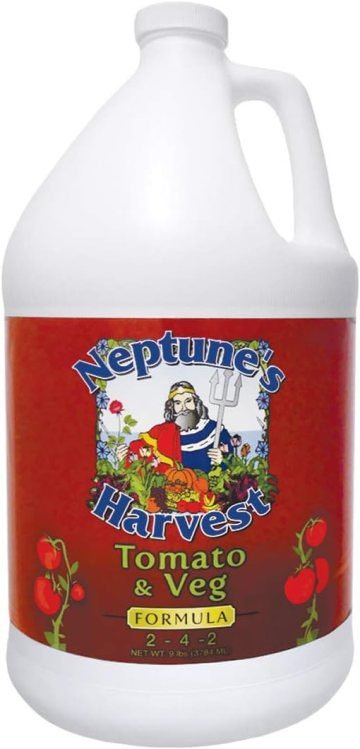
If you prefer a liquid fertilizer, I like to use Neptune’s Harvest Tomato & Veg. The N-P-K ratio is 2-4-2, so it is a good choice when looking for an organic solution that is higher in Phosphorus.
I do recommend you visit your local extension office to do a soil test. If that isn’t an option, you can also do a simple home test.
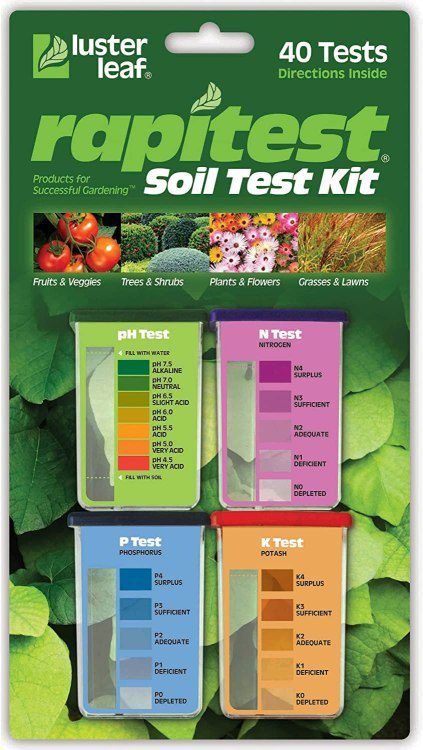
Personally, I have done a lot of home soil tests over the years and they have always revealed that my soil was VERY HIGH in phosphorus. In early 2023, while I was going through the Master Gardener program, I did get my soil tested through the extension office. I was very pleased to see the results lined up exactly with what I had gathered from my home tests.
One thing to keep in mind is that Phosphorus is considered immobile in soils. So if you do have high levels of phosphorus in your soil, it doesn’t exactly mean the nutrient is readily available to your plant. Phosphorus availability is affected by soil pH. We will go in to greater detail in a future article on what this means exactly.
Pest and Disease Management:
Ground Cherries are relatively pest-resistant, but like any plant, they can still face challenges. Keep an eye out for common pests like aphids, whiteflies, and tomato hornworms. The biggest pest I seem to deal with on my ground cherries are ants and pill bugs. This is typically remedied by a sprinkling of DE or Diatomaceous Earth on the plant and around the soil line.
Try encouraging natural predators like lady bugs in to your garden. Or use insecticidal soaps if needed. Regularly inspect plants for signs of disease, such as powdery mildew or blight. If you notice any issues, be sure to remove and dispose of affected plant parts to prevent spreading. Make sure to NEVER compost diseased plants.
Harvesting:
Ground Cherries mature in about 70-90 days from transplanting. The husks will turn brown and papery when the fruits are ready to harvest. You can gently pluck the husks from the plant to harvest the ripe fruit. You can also let cherries fall to the ground and collect them from the husks.
Storing and Using Ground Cherries:
Ground Cherries can be stored in their husks in a cool, dry place for several weeks. Alternatively, you can remove the husks and store the fruits in the refrigerator for a shorter period. I like to enjoy Ground Cherries fresh, right out of the garden. They can also be used in salads, jams, pies, or even salsa!
Saving Seeds:
If you are interested in growing ground cherries again next year, you can save the seeds from mature fruits. I tend to do this when I come across one that I let get too ripe, or maybe a bug got to it before me. The seeds are very tiny. You will want to lay them out on wax paper to dry overnight. You may need to soak in water for a bit, to get the gel-like coating to dissolve first. Once they are thoroughly dry, you can store them in a cool, dark location until next year. We’ll be sure to make a video of the process, next time we save Ground Cherry Seeds.
Crop Rotation:
To prevent the buildup of soil-borne diseases and pests, we encourage you to always practice crop rotation WHEN POSSIBLE. Obviously, not everyone has this luxury. If you absolutely can NOT do crop rotation, we recommend “soil rotation”. We do this by scooping off the top 6 inches of soil from each of our raised beds at the end of the growing season. We toss this in to the compost for a few weeks, to help rebuild and replenish the soil. As we pull finished compost out of our bins, we fill up plastic tubs and allow the compost to sit and cure for a few weeks. Once cured, we top up any of the beds that we have removed soil from.
We do make sure our compost bins get to the optimal “cooking stage” to ensure that anything bad has been eliminated. You’ll need to make sure you have a good compost thermometer to do this. Even so, we recommend you NEVER put diseased or pest-ridden plants in your compost.
Conclusion:
Growing Ground Cherries in an organic vegetable garden can be a rewarding experience, offering a unique and delicious addition to your harvest. By following this comprehensive guide, you’ll be well-equipped to successfully cultivate healthy ground cherry plants, from seed starting to harvesting.
Remember to prioritize soil health, provide adequate sunlight and water, and address any pest or diseases in an environmentally friendly manner. With proper care, you’ll be enjoying the sweet and tangy flavors of ground cherries in no time.
Have you ever tried Ground Cherries? Let us know in the comments. Are you planning to grow them yourself? What do you think they taste like? Personally, I think they resemble a cross between pineapple and kiwi but with the texture of a small seedless grape. This is one of the reasons I LOVE growing them. We are in Oklahoma Zone 7A and we certainly can’t grow tropical fruit here. Not easily, anyway. My ground cherries are the closest thing I get to homegrown tropical fruit flavors! I truly believe more people need to know about them and grow them. I hope this guide has convinced you to give it a try!
0 Comments